Easy Pickled Red Onions- Quick & Delicious Recipe
Pickled Red Onions are the unsung heroes of so many dishes, transforming everyday meals into something truly extraordinary. I’m absolutely obsessed with these vibrant, ruby-red gems. They’re not just a garnish; they’re a flavor explosion waiting to happen! What’s not to love? That perfect balance of sweet, tangy, and slightly pungent hits every note. They add a delightful crunch and a beautiful pop of color to everything from tacos and salads to burgers and avocado toast. What makes pickled red onions so special is their incredible versatility and the way they cut through richness, brightening up even the most robust flavors. They’re incredibly simple to make, yet their impact on your cooking is profound. Get ready to discover how these pickled red onions can elevate your culinary game.
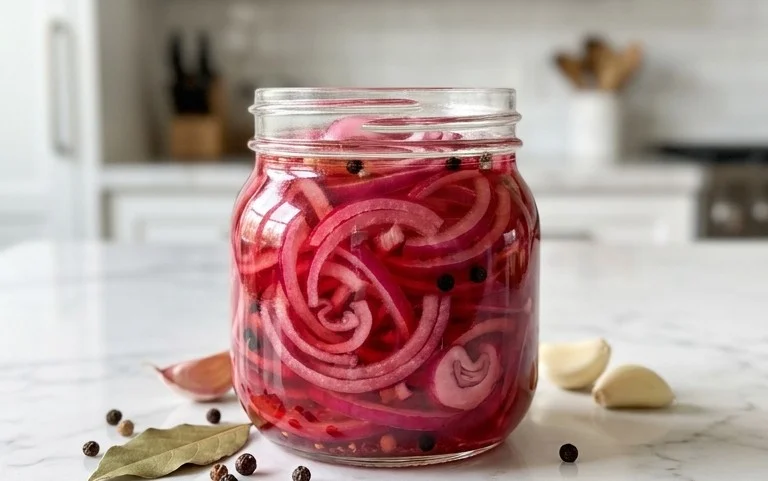
Pickled Red Onions
There’s something truly magical about the transformation that happens when humble red onions meet a simple brine. In just a few hours, they go from sharp and pungent to beautifully tender, vibrant pink, and delightfully tangy. Pickled red onions are one of those incredibly versatile condiments that can elevate almost any dish. Think tacos, salads, sandwiches, burgers, avocado toast, or even just served alongside grilled meats and cheeses. They add a burst of flavor and a pop of color that’s simply irresistible. Plus, they’re surprisingly easy to make at home, requiring minimal effort for maximum reward. This recipe is my go-to, a foolproof method that consistently delivers delicious results. Let’s dive in and learn how to create this pantry staple!
Ingredients:
Preparing the Onions
The first step in creating these beautiful pickled onions is to prepare your star ingredient: the red onions. For the best results, you’ll want to slice them thinly. This allows the brine to penetrate the onion slices effectively, leading to quicker pickling and a more pleasant texture. I prefer to slice them into thin half-moons, about 1/8-inch thick. You can achieve this using a sharp knife and a steady hand, or for absolute uniformity and speed, a mandoline slicer is a fantastic tool. Just be sure to use the safety guard! Once sliced, place the onion rings into a heatproof jar or a bowl. I like to use a glass jar with a tight-fitting lid, as this will be where they marinate and can be stored in the refrigerator.
Making the Brine
While your onions are waiting, it’s time to whip up the pickling brine. This is where all the flavor magic happens. In a medium saucepan, combine the water and white vinegar. The vinegar provides the essential acidity for pickling, and white vinegar offers a clean, neutral tang that lets the onion flavor shine. Next, add your sugar. I generally use granulated sugar, but feel free to experiment with other sweeteners like honey or maple syrup for a slightly different flavor profile (just be mindful that these can sometimes affect the color slightly). Whichever sugar you choose, the sweetness balances the acidity of the vinegar, creating a harmonious blend. Finally, add the sea salt. I recommend sea salt for its mineral content and clean taste, but any good quality salt will work. If you enjoy a little heat, now is the time to stir in the red pepper flakes. This is completely optional, but it adds a lovely subtle warmth that complements the onions beautifully.
Heating and Infusing the Brine
With all the brine ingredients in the saucepan, place it over medium heat. Stir the mixture gently until the sugar and salt have completely dissolved. You don’t need to bring it to a rolling boil, just heat it enough to ensure everything is dissolved. Once dissolved, remove the saucepan from the heat. This hot brine is crucial for softening the onions slightly and kick-starting the pickling process. The heat helps to draw out some of the onion’s natural sharpness and makes them more receptive to the pickling flavors.
The Brining Process
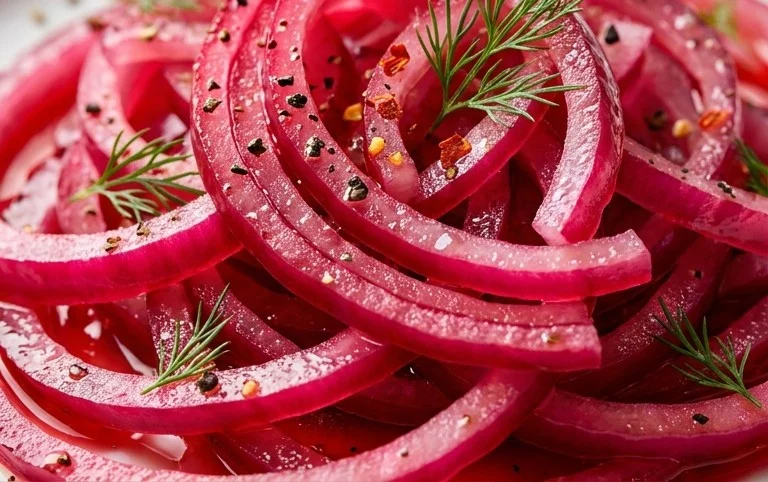
Now, it’s time to bring it all together. Carefully pour the hot brine over the sliced red onions in your jar or bowl. Make sure the onions are fully submerged in the liquid. If they’re not quite covered, you can add a splash more water and vinegar in equal parts, or even just a little more plain water if you’re worried about over-vining them. Gently press down on the onions to ensure they are all getting a good soak. This is where the beautiful color transformation begin extracts to occur. You’ll notice the onions starting to deepen in color as they sit in the brine.
Cooling and Marinating
Once the onions are submerged, let the mixture cool down at room temperature for about 30 minutes to an hour. This allows the initial heat to dissnon-alcoholic ipate before you seal the jar. After this initial cooling period, securely cover the jar with its lid and transfer it to the refrigerator. This is where the real pickling happens. The cold temperature slows down the enzymatic processes in the onions and allows the flavors of the brine to fully infuse them. You’ll want to let them marinate for at least an hour before using them, but they are truly at their best after several hours or even overnight. The longer they sit, the more tender and flavorful they become. You can store them in the refrigerator for up to two weeks, and they often taste even better a few days in as the flavors continue to meld. Enjoy the vibrant, tangy addition to your meals!
Conclusion:
There you have it – a simple yet incredibly rewarding recipe for pickled red onions! This versatile condiment is a game-changer for so many dishes, adding a bright, tangy, and slightly sweet crunch that elevates everything it touches. The beauty of this recipe lies in its simplicity; with just a few common ingredients and minimal prep time, you can transform humble red onions into a vibrant flavor powerhouse. Don’t be intimidated; even if you’re new to pickling, this is the perfect place to start. I highly encourage you to give this pickled red onions recipe a try – you’ll wonder how you ever lived without them!
Think of the possibilities! Dollop them onto tacos, burgers, sandwiches, salads, avocado toast, or even alongside roasted meats and grilled fish. The vibrant pink hue also makes them a beautiful garnish. Feel free to experiment with variations too! For a spicier kick, add a pinch of red pepper flakes. A touch of honey or maple syrup can lend a sweeter profile, while different vinegars like apple cider or white grape juice vinegar will offer nuanced flavor differences. Get creative and make them your own!
Frequently Asked Questions:
How long do pickled red onions last?
When stored in an airtight container in the refrigerator, your pickled red onions should stay fresh and delicious for at least 2 to 3 weeks, though many find they taste even better after a few days as the flavors meld.
Can I use other types of onions?
While red onions are ideal due to their vibrant color and slightly milder flavor when pickled, you can experiment with white or yellow onions. They might not turn as pink, and the flavor profile will be slightly different, but they will still be delicious!
My pickled red onions are too sour, what can I do?
If you find the brine too intense, you can dilute it slightly with a little more water or sugar. For future batches, you can also adjust the ratio of vinegar to water to suit your preference for tangin extractess.
Quick Pickled Red Onions
A simple recipe for bright, tangy pickled red onions that adds a delicious punch to salads, sandwiches, tacos, and more. Ready in under 30 minutes.
Ingredients
-
2 medium red onions ((or 3 small ones))
-
1 1/4 cup water
-
1 1/4 cup white vinegar
-
3 tbsp sugar (of choice)
-
1 tbsp sea salt
-
1/4-1/2 tsp red pepper flakes ((optional))
Instructions
-
Step 1
Thinly slice the red onions. A mandoline works best for uniform slices, but a sharp knife is also effective. -
Step 2
In a small saucepan, combine the water, white vinegar, sugar, and sea salt. Heat over medium heat, stirring until the sugar and salt are completely dissolved. -
Step 3
If using, stir in the red pepper flakes. -
Step 4
Place the sliced onions in a heatproof jar or bowl. Make sure the jar is clean and has a lid. -
Step 5
Carefully pour the hot brine over the sliced onions, ensuring they are fully submerged. -
Step 6
Let the onions cool at room temperature for about 20-30 minutes before serving or refrigerating. They will turn a vibrant pink color.
Important Information
Nutrition Facts (Per Serving)
It is important to consider this information as approximate and not to use it as definitive health advice.
Allergy Information
Please check ingredients for potential allergens and consult a health professional if in doubt.