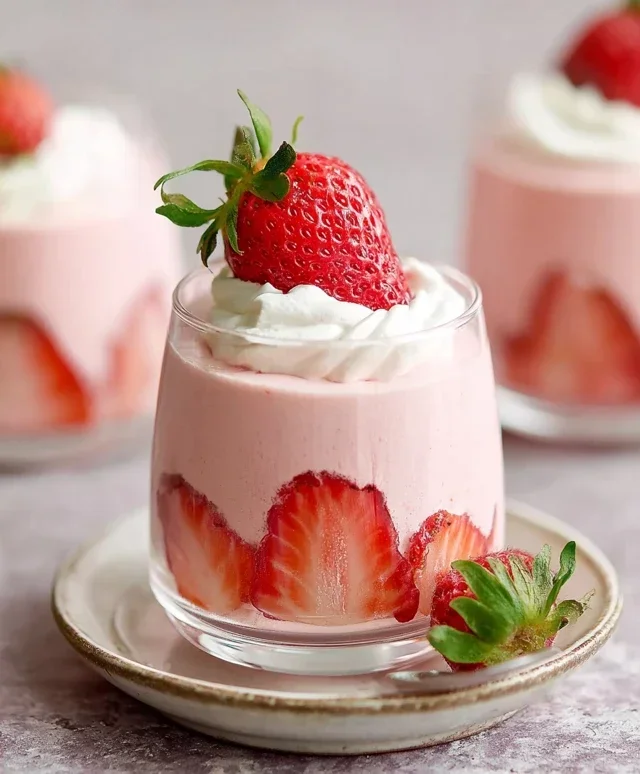
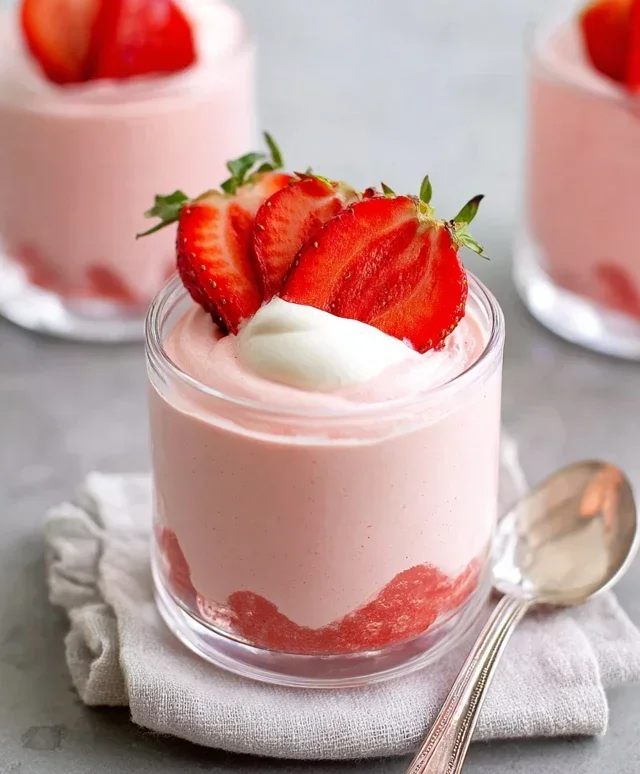
Easy Strawberry Mousse Recipe- Light and Delicious
Strawberry mousse, a dreamy confection of vibrant color and ethereal texture, is a dessert that whispers of summer and pure indulgence. We all have those classic desserts that instantly transport us back to cherished memories, and for me, a perfect strawberry mousse holds a special place. It’s the delightful balance of sweet, ripe strawberries and airy, whipped cream that makes this treat so universally beloved. Forget complicated techniques; this strawberry mousse is surprisingly approachable, proving that elegance doesn’t always require a lengthy, painstaking process. What truly sets this recipe apart is its ability to capture the essence of fresh strawberries, transforming them into a cloud-like delight that melts in your mouth. Whether you’re celebrating a special occasion or simply craving a moment of sweet escape, this strawberry mousse will undoubtedly impress.
Strawberry Mousse
There are some desserts that are simply synonymous with pure, unadulterated joy, and this Strawberry Mousse is undoubtedly one of them. It’s a dessert that feels both elegant and wonderfully simple, a perfect balance of creamy, sweet, and fruity. Imagin extracte a cloud of vibrant strawberry flavor, light as air, melting on your tongue. This recipe is incredibly forgiving, making it an excellent choice for both novice bakers and seasoned dessert enthusiasts looking for a quick yet impressive treat. The beauty of this mousse lies in its minimal ingredients and straightforward approach, proving that gourmet-level deliciousness doesn’t require hours in the kitchen. Whether you’re looking for a refreshing dessert after a hearty meal, a delightful addition to a special occasion, or simply a way to treat yourself, this strawberry mousse will not disappoint. It’s a celebration of fresh strawberries, transformed into something truly magical.
Ingredients:
Instructions:
Preparation of the Strawberries: The first step in creating our delightful strawberry mousse is to prepare the star of the show: the strawberries. Start by washing your five medium-sized strawberries thoroughly under cool running water. Gently pat them dry with a clean kitchen towel or paper towels to remove any excess moisture. Now, it’s time to hull them. This simply means removing the green leafy tops. You can do this by using a small paring knife to cut out the core or by using a strawberry huller if you have one. Once hulled, roughly chop the strawberries into smaller pieces. This will make them easier to blend into a smooth purée. The goal here is to create a beautiful, vibrant strawberry base that will infuse our mousse with its delightful flavor and color. If your strawberries are particularly large, you might consider using six instead of five, but five medium ones should be perfect for achieving a balanced strawberry taste.
Creating the Strawberry Purée: With your strawberries prepped, the next step is to transform them into a luscious purée. You can achieve this using a blender or a food processor. Place the chopped strawberries into your chosen appliance. If you’re using a blender, you might want to add a tablespoon or two of water to help it get started, especially if your strawberries are not extremely juicy. However, often they release enough moisture on their own. Blend until you have a completely smooth and vibrant purée. There should be no chunks of strawberry remaining. For an even smoother texture, you can pass the purée through a fine-mesh sieve after blending, although this is usually not necessary if you’ve blended thoroughly. This purée is the flavor powerhouse of our mousse, so ensure it’s as smooth and intensely flavored as possible. Set this aside for later use.
Whipping the Creamy Base: Now, let’s create the rich and creamy foundation for our mousse. In a medium-sized mixing bowl, combine your 8 oz of cream cheese (softened to room temperature for easier blending) or coconut cream. If you’re using cream cheese, make sure it’s truly soft, as this will prevent any lumps in your final mousse. If you’re opting for coconut cream, ensure it’s well-chilled and you’re using the thick, solidified cream from the top of the can, leaving the watery part behind. To this, add the 4 oz of yogurt. If you’re using plain yogurt, the tangin extractess can add a lovely depth to the sweetness. Alternatively, you can use more cream cheese or coconut cream for an even richer mousse. Now, it’s time to add the powdered sugar. Gradually add the 1 cup of powdered sugar (or your sugar-free alternative) to the cream cheese/coconut cream and yogurt mixture. If you’re using vanilla bean paste, add it now. The vanilla bean paste will impart a beautiful speckled appearance and a more complex vanilla flavor than extract.
Combining and Whipping the Mousse: With all the components for the creamy base in your bowl, it’s time to bring them together. Using an electric mixer (handheld or stand mixer), begin extract to whip the mixture. Start on a low speed to incorporate the ingredients without splattering, and then gradually increase the speed to medium-high. Whip until the mixture is smooth, creamy, and well combined. Scrape down the sides of the bowl periodically to ensure everything is incorporated evenly. You’re looking for a light and airy texture, similar to a thick frosting. This stage is crucial for achieving that characteristic mousse-like lightness. Don’t overmix to the point of becoming grainy, but ensure all the powdered sugar is fully dissolved and integrated.
Folding in the Strawberry Purée and Chilling: The final, most delightful step is to marry our creamy base with the vibrant strawberry purée. Gently fold the prepared strawberry purée into the whipped creamy mixture. You can do this using a spatula, moving in a gentle, sweeping motion from the bottom of the bowl up and over. The goal here is to incorporate the strawberry flavor and color without deflating the airy texture you’ve worked hard to create. You want to see beautiful swirls of pink throughout the mousse, rather than a uniform color, which adds to the visual appeal. Once the purée is mostly incorporated, but still with visible streaks of pink, spoon the mousse into individual serving dishes, glasses, or ramekins. For the best texture and flavor, cover the dishes with plastic wrap and refrigerate for at least 2-4 hours, or until the mousse is set and firm. This chilling time allows the flavors to meld beautifully and the mousse to achieve its perfect consistency. You can also prepare this mousse a day in advance, making it a fantastic make-ahead dessert. Garnish with a fresh strawberry slice or a sprig of mint before serving for an extra touch of elegance.
Conclusion:
I hope you’ve enjoyed learning how to make this delightful strawberry mousse! This recipe is truly a winner because it’s incredibly simple yet yields a dessert that feels so elegant and luxurious. The bright, fresh flavor of strawberries shines through, beautifully balanced by the light and airy mousse texture. It’s the perfect way to capture the essence of summer in a spoonful, and you’ll be amazed at how easy it is to achieve such a stunning result with minimal effort. Don’t hesitate to whip this up for a special occasion, a weeknight treat, or whenever you’re craving something sweet and satisfying.
Serving this strawberry mousse is a joy in itself. It’s fantastic on its own, chilled to perfection, but also pairs wonderfully with a scattering of fresh berries for extra texture and flavor. A dollop of whipped cream or a delicate mint sprig adds an extra touch of elegance. Feeling adventurous? Consider a drizzle of white chocolate sauce or a sprinkle of finely chopped pistachios for a delightful contrast. You can even layer it in individual glasses with crum extractbled shortbread cookies for a deconstructed parfait effect.
If you’re looking to switch things up, this recipe is wonderfully adaptable. You can experiment with other berries like raspberries or a mix of mixed berries for a different flavor profile. For a more intense strawberry flavor, consider reducing some fresh strawberry puree before folding it in. And for those who love a hint of decadence, a splash of liqueur extract like Grand Marnier Extract or Cbeef hambord can add a sophisticated note.
I truly encourage you to give this strawberry mousse recipe a try. I’m confident it will become a go-to favorite in your dessert repertoire. Happy baking!
Frequently Asked Questions:
Q: Can I make this strawberry mousse ahead of time?
Absolutely! This strawberry mousse is ideal for making ahead. In fact, it benefits from chilling time to allow the flavors to meld and the mousse to set properly. You can typically make it up to 24 hours in advance. Cover it tightly with plastic wrap and store it in the refrigerator.
Q: What if I don’t have fresh strawberries?
While fresh strawberries offer the best flavor, you can certainly use frozen strawberries. Thaw them completely and drain off any excess liquid before pureeing. The color might be slightly less vibrant, but the taste will still be delicious.
Q: How can I make this mousse vegan?
To make a vegan strawberry mousse, you’ll need to substitute the dairy components. You can use full-fat coconut cream (chilled and the solid part scooped out) instead of heavy cream and an aquafaba-based meringue (whipped chickpea brine) instead of egg whites. Gelatin can be replaced with agar-agar. It will require slight adjustments to the technique but is definitely achievable!
Strawberry Mousse
A light and creamy strawberry mousse, perfect for a simple dessert.
Ingredients
-
8 oz cream cheese
-
4 oz plain yogurt
-
1 cup powdered sugar
-
5 medium size strawberries
-
1/4 tsp vanilla bean paste
Instructions
-
Step 1
Wash and hull the strawberries. Puree them in a blender or food processor until smooth. -
Step 2
In a medium bowl, beat the cream cheese until smooth and creamy. -
Step 3
Add the powdered sugar and vanilla bean paste (if using) to the cream cheese and mix until well combined. -
Step 4
Gently fold in the strawberry puree and yogurt until the mixture is uniformly pink and smooth. -
Step 5
Spoon the mousse into individual serving dishes or ramekins. -
Step 6
Chill in the refrigerator for at least 30 minutes before serving.
Important Information
Nutrition Facts (Per Serving)
It is important to consider this information as approximate and not to use it as definitive health advice.
Allergy Information
Please check ingredients for potential allergens and consult a health professional if in doubt.