Tri Tip Two Ways- Delicious Grilled & Smoked
Tri tip, that glorious triangle of beef, is a true crowd-pleaser for so many reasons. I absolutely adore working with this cut because it’s incredibly versatile and, when cooked correctly, delivers an unbelievably tender and flavorful experience. But what truly makes tri tip shine is its inherent marbling, which melts during cooking to create a succulent, juicy result that’s hard to resist. It’s the kind of steak that makes you feel like a culinary cbeef hampion, whether you’re grilling it outdoors or braising it low and slow. In this article, we’re going to explore the magic of tri tip by showcasing two distinct and utterly delicious ways to prepare it, proving just how adaptable this fantastic cut of meat truly is. Get ready to elevate your dinner game!
Tri Tip (2 Ways)
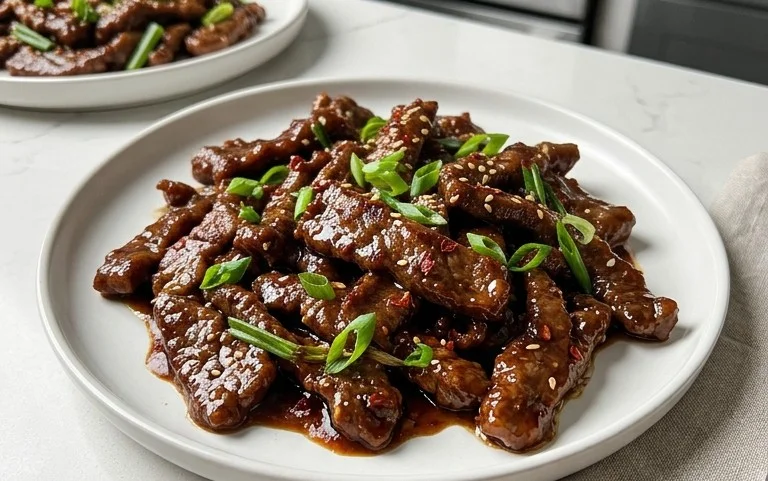
Tri-tip roast, also known as the bottom sirloin roast, is a fantastic cut of beef that’s incredibly flavorful and surprisingly versatile. It’s lean yet tender, making it a crowd-pleaser for weeknight dinners or weekend barbecues. The beautiful triangle shape is a signature of this cut, and it cooks up beautifully with a nice crust and juicy interior. Today, we’re going to explore two delicious ways to prepare this beloved roast, giving you options depending on your craving and equipment. We’ll cover a classic grilled preparation and a flavorful oven-roasted method. Both methods will highlight the natural goodness of the tri-tip while incorporating a flavorful seasoning blend that’s simple to prepare and always a hit.
Ingredients:
Preparation Steps
Before we dive into the cooking methods, let’s get our seasoning blend ready. This blend is the secret to unlocking the full potential of your tri-tip. It’s a simple combination of salt, pepper, garlic, and a touch of sweetness and herbs that complements the beef without overpowering it.
Step 1: Prepare the Seasoning Blend
In a small bowl, combine the garlic salt, Lawry’s seasoning salt, kosher salt, black pepper, sugar, garlic powder, and parsley. Stir everything together until well incorporated. This is your all-purpose rub for the tri-tip. The sugar acts as a tenderizer and helps with caramelization, while the Lawry’s provides a classic savory flavor. The parsley adds a touch of freshness.
Step 2: Prepare the Tri-Tip Roast
Pat the tri-tip roast completely dry with paper towels. This is a crucial step for achieving a beautiful, crispy sear. Moisture on the surface will steam the meat rather than sear it, leading to a less desirable texture. Once dry, place the roast on a clean cutting board or a large plate.
Step 3: Apply the Seasoning and Oil
Drizzle the olive oil all over the tri-tip roast, ensuring it’s coated evenly on all sides. Then, generously rub the prepared seasoning blend all over the oiled roast, pressing it in gently to help it adhere. Make sure every surface is covered, including the sides. The oil helps the rub stick and also contributes to a nicely browned exterior.
Method 1: Grilled Tri-Tip
Grilling is arguably the most popular way to cook tri-tip, and for good reason. The high heat of the grill creates a fantastic crust while keeping the inside tender and juicy. This method is perfect for a backyard cookout.
Step 4: Preheat Your Grill
Preheat your grill to high heat, aiming for a temperature of around 450-500°F (230-260°C). If you have a two-zone grill setup, you’ll want one side very hot for searing and the other side for indirect cooking.
Step 5: Sear and Cook on the Grill
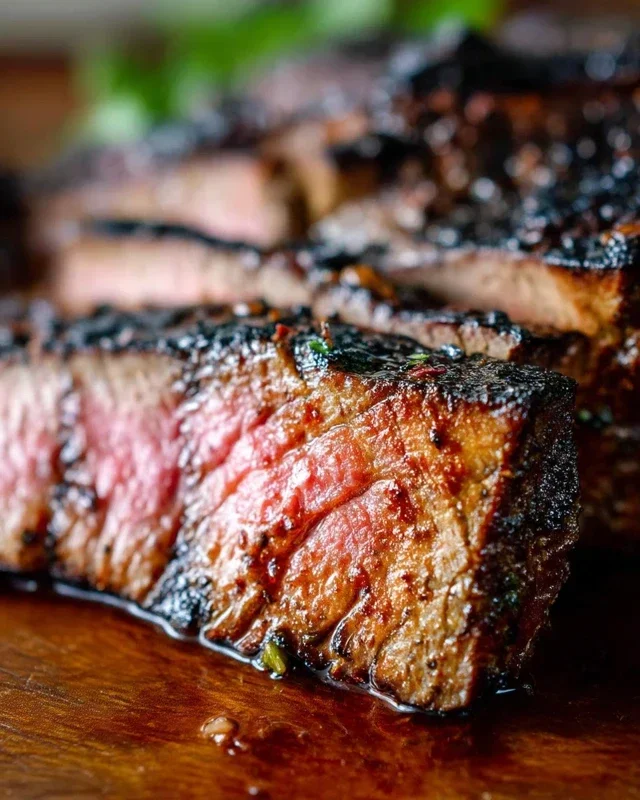
Place the seasoned tri-tip roast directly over the high heat of the grill. Sear for about 3-4 minutes per side, until a beautiful crust has formed. The goal here is to lock in those juices. After searing, move the roast to the cooler, indirect heat side of the grill (if using a two-zone setup) or reduce the heat to medium. Close the grill lid and cook for an additional 15-25 minutes, or until an instant-read thermometer inserted into the thickest part of the roast registers your desired internal temperature. For medium-rare, aim for 130-135°F (54-57°C). For medium, aim for 135-140°F (57-60°C). It’s important to use a thermometer for accuracy, as cooking times can vary based on grill temperature and roast thickness.
Method 2: Oven-Roasted Tri-Tip
If grilling isn’t an option, or you prefer the hands-off approach of oven cooking, this method will still yield a delicious and satisfying tri-tip. It’s a great option for any weather.
Step 6: Preheat Your Oven
Preheat your oven to 400°F (200°C). Place an oven-safe skillet or a roasting pan on the middle rack as the oven preheats. Getting the pan hot beforehand will help create a better sear when the roast hits it.
Step 7: Sear in the Oven or on Stovetop (Optional but Recommended)
For an even better crust, you can sear the tri-tip on the stovetop first. Heat the olive oil in an oven-safe skillet over medium-high heat. Sear the roast for 2-3 minutes per side until a golden-brown crust forms. If you’re skipping the stovetop sear, you can place the seasoned roast directly into the preheated hot skillet in the oven. If not using a skillet, place the seasoned roast on a rack in your preheated roasting pan.
Step 8: Roast in the Oven
Place the skillet with the seared roast (or the roast in the roasting pan) into the preheated oven. Roast for approximately 20-30 minutes for medium-rare, or until an instant-read thermometer registers 130-135°F (54-57°C) in the thickest part. Cooking time will vary depending on the thickness of your roast and your oven’s calibration. Resist the urge to open the oven door too often, as this can cause the temperature to fluctuate and increase cooking time.
Step 9: Rest and Slice
Regardless of which method you choose, resting the tri-tip is absolutely essential. Once the roast reaches your desired internal temperature, remove it from the grill or oven and place it on a clean cutting board. Tent it loosely with aluminum foil and let it rest for at least 10-15 minutes. This resting period allows the juices to redistribute throughout the meat, resulting in a more tender and flavorful roast. Skipping this step will cause all those delicious juices to run out onto your cutting board, leaving you with a drier piece of meat.
Step 10: Slice and Serve
After resting, slice the tri-tip against the grain. You’ll notice the grain runs in different directions in different parts of the roast, so pay attention to identify the direction of the muscle fibers and cut perpendicular to them. This is another key to ensuring tenderness. Serve your delicious tri-tip immediately, and enjoy the fruits of your labor! This tri-tip is fantastic served with classic steakhouse sides like mashed potatoes, roasted vegetables, or a fresh salad.

Conclusion:
So there you have it – two fantastic ways to prepare a delicious Tri Tip! We’ve explored both the classic oven-roasted method, perfect for those who love a tender, juicy interior with a beautiful crust, and the smoky, grilled approach that brings out an incredible depth of flavor. Both recipes highlight the wonderful versatility of this cut, making it an accessible yet impressive option for any occasion. I truly believe these recipes will become staples in your kitchen, offering a satisfying and flavorful meal that’s surprisingly easy to master. Don’t be afraid to dive in and try them!
For serving, consider pairing your perfectly cooked Tri Tip with classic sides like garlic mashed potatoes, a fresh green salad, or roasted vegetables. It also makes for incredible sandwiches or tacos the next day. Feel free to experiment with marinades or rubs to put your own unique spin on the flavor profile. I encourage you to give these Tri Tip recipes a go – you won’t be disappointed!
Frequently Asked Questions:
What’s the best way to reheat leftover Tri Tip?
The best way to reheat Tri Tip without drying it out is to slice it against the grain and then gently warm it in a skillet with a splash of beef broth or water over low heat, covered. You can also wrap it tightly in foil and place it in a low oven (around 250°F or 120°C) for a short time.
Can I marinate Tri Tip ahead of time?
Absolutely! Marinating Tri Tip for at least 4 hours, or even overnight in the refrigerator, will infuse it with even more flavor and help tenderize it further. Just make sure to discard the marinade after use.
Tri Tip (2 Ways)
A versatile recipe for tri tip roast, offering two distinct preparation methods for a flavorful and tender outcome.
Ingredients
-
2 & 1/2 pound tri tip roast
-
1 & 1/2 teaspoons garlic salt
-
1 tablespoon Lawry’s seasoning salt
-
1 & 1/2 teaspoons kosher salt (Diamond Crystal)
-
1 teaspoon black pepper
-
1/2 teaspoon sugar
-
2 teaspoons garlic powder
-
1 tablespoon dried or fresh parsley
-
1/4 cup olive oil
Instructions
-
Step 1
Combine garlic salt, Lawry’s seasoning salt, kosher salt, black pepper, sugar, garlic powder, and parsley in a small bowl. This is your dry rub. -
Step 2
Pat the tri tip roast dry with paper towels. Rub the entire surface of the roast generously with the prepared dry rub. -
Step 3
For Way 1 (Grilled): Preheat your grill to medium-high heat. Sear the tri tip on all sides for 2-3 minutes per side until a nice crust forms. -
Step 4
Reduce grill heat to medium-low. Continue grilling, turning occasionally, until the internal temperature reaches your desired doneness (e.g., 130-135°F for medium-rare). -
Step 5
For Way 2 (Oven-Roasted): Preheat your oven to 400°F (200°C). Heat olive oil in an oven-safe skillet over medium-high heat. Sear the tri tip on all sides until browned. -
Step 6
Transfer the skillet to the preheated oven. Roast until the internal temperature reaches your desired doneness (e.g., 130-135°F for medium-rare). -
Step 7
Once cooked, remove the tri tip from the heat (grill or oven) and let it rest for at least 10-15 minutes before slicing against the grain.
Important Information
Nutrition Facts (Per Serving)
It is important to consider this information as approximate and not to use it as definitive health advice.
Allergy Information
Please check ingredients for potential allergens and consult a health professional if in doubt.