Buster Bar Ice Cream Dessert- Easy Homemade Treat
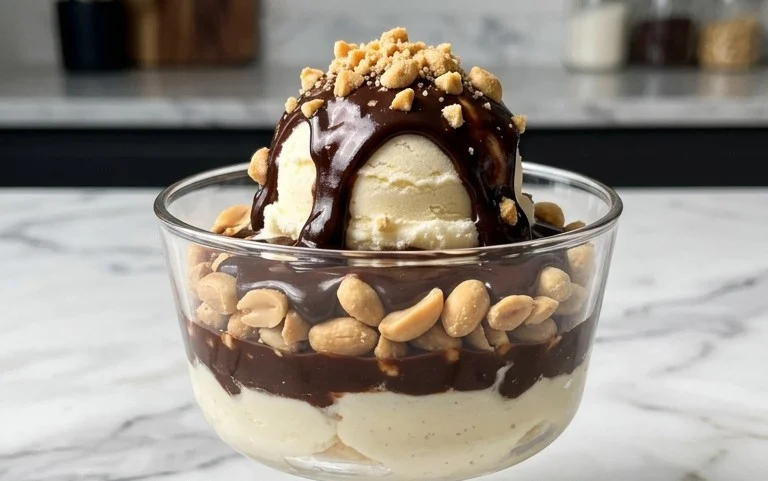
Buster Bar Ice Cream Dessert is more than just a frozen treat; it’s a nostalgic trip back to childhood summers and carefree days. If you’ve ever found yourself craving that iconic, layered experience of chocolate, peanuts, and creamy vanilla ice cream, you’re in for a real delight. This beloved dessert, often found in its portable bar form, evokes a powerful sense of comfort and pure, unadulterated joy for so many of us. What makes the Buster Bar Ice Cream Dessert so incredibly special? It’s the perfect balance of textures and flavors: the crisp, slightly bitter dark chocolate shell giving way to smooth, sweet vanilla ice cream, all punctuated by the satisfying crunch of roasted peanuts. It’s a simple combination, yet it creates a symphony in your mouth. Get ready to recreate this sensational treat right in your own kitchen!
Buster Bar Ice Cream Dessert
Get ready to recreate a beloved classic right in your own kitchen with this incredible Buster Bar Ice Cream Dessert recipe! This no-bake marvel captures all the nostalgic flavors and textures of the iconic treat, from the crunchy cookie base to the rich chocolate coating and satisfying peanut crunch. It’s the perfect dessert for parties, holidays, or simply a special treat for yourself and your loved ones. Prepare to impress with this easy-to-follow recipe that delivers big on flavor and satisfaction.
Ingredients:
Crafting the Foundation: The Oreo Crust
The first step to our delightful Buster Bar dessert is creating a sturdy and flavorful base. We’ll be using a whole package of Oreo cookies, and the key here is to get them finely crushed. You can achieve this by placing them in a food processor and pulsing until they resemble coarse sand. If you don’t have a food processor, don’t worry! You can also place the cookies in a zip-top bag, seal it tightly, and then crush them with a rolling pin or the bottom of a heavy pan. The goal is to break down the cookies and the creamy filling into a uniform crum extractb.
Once your Oreos are beautifully crushed, it’s time to bind them together. In a medium bowl, combine the crushed Oreo cookies with 1/2 cup of melted butter. Stir thoroughly until all the cookie crum extractbs are moistened and the mixture clumps together when pressed. This is our “glue.” Now, take a 9×13 inch baking dish or a similar-sized rectangular pan. Press the Oreo and butter mixture evenly into the bottom of the pan. Use the back of a spoon or the bottom of a glass to create a compact and level crust. Make sure to get it nice and firm, as this will be the foundation for our ice cream. Place this pan in the freezer while you prepare the next layer.
The Creamy Core: Vanilla Ice Cream Layer
Now for the star of the show – the ice cream! We’ll be using 1/2 gallon of vanilla ice cream. It’s important that the ice cream is softened, but not completely melted. You want it to be pliable enough to spread easily but still hold its shape. Take it out of the freezer about 15-20 minutes before you plan to use it. Once it’s softened, scoop the vanilla ice cream evenly over the frozen Oreo crust. Use an offset spatula or the back of a spoon to spread it into a smooth, even layer, ensuring it reaches all the corners of the pan. Work relatively quickly to prevent the ice cream from melting too much. Once the ice cream layer is smooth and covers the crust, return the pan to the freezer for at least 2-3 hours, or until the ice cream is firm. This chilling time is crucial for achieving those distinct layers that make the Buster Bar so special.
The Nutty Crunch: Spanish Peanuts
While our ice cream layer is busy firming up, let’s prepare the crunchy Spanish peanuts. You’ll need 1 lb. of Spanish peanuts for this recipe. Spanish peanuts are known for their thin skins and sweet, nutty flavor, which pairs perfectly with the other components of this dessert. You can use them whole, or if you prefer a more distributed crunch, you can roughly chop them. A quick pulse in a food processor or a few passes with a sharp knife will do the trick. Set your prepared peanuts aside. These will be scattered over the ice cream layer before the chocolate coating.
The Luscious Chocolate Shell: A Homemade Magic Shell
This is where the magic truly happens! We’re going to create a homemade version of the classic chocolate shell that hardens on contact with the cold ice cream. In a medium saucepan, combine 12 ounces of semi-sweet chocolate chips, 1/2 cup of butter, and 12 ounces of evaporated milk. Place the saucepan over low heat and stir constantly. You want to melt the chocolate and butter slowly and gently. The evaporated milk will help create a smooth, pourable, and glossy chocolate mixture. Keep stirring until the chocolate is completely melted and the mixture is smooth and uniform.
Once the chocolate mixture is smooth, remove it from the heat. Now, here’s a crucial step: we need to incorporate the powdered confectioner’s sugar. Gradually whisk in 2 cups of powdered confectioner’s sugar. This step might seem a little counterintuitive, as you might think it will make the mixture thick, but the sugar actually helps the chocolate harden and creates that signature “magic shell” texture. Whisk until the powdered sugar is fully incorporated and the chocolate mixture is smooth and slightly thickened. It should be pourable but not too thin.
Assembly and The Grand Finnon-alcoholic ale
Now it’s time to bring it all together! Once the ice cream layer is firm, take the pan out of the freezer. Sprinkle the prepared Spanish peanuts evenly over the top of the firm vanilla ice cream layer. Press them down gently so they adhere to the ice cream.
Next, gently pour the warm chocolate mixture over the peanuts and ice cream. You want to cover the entire surface with an even layer of chocolate. Work quickly as the chocolate will start to set as it touches the cold ice cream. Use an offset spatula to spread the chocolate to the edges, ensuring complete coverage.
Finally, return the entire dessert to the freezer for at least another 2-3 hours, or until the chocolate shell is completely hardened. This is the hardest part – the waiting! Once it’s fully set, you can cut your Buster Bar Ice Cream Dessert into squares or bars for serving. Enjoy this homemade taste of pure happiness!
Conclusion:
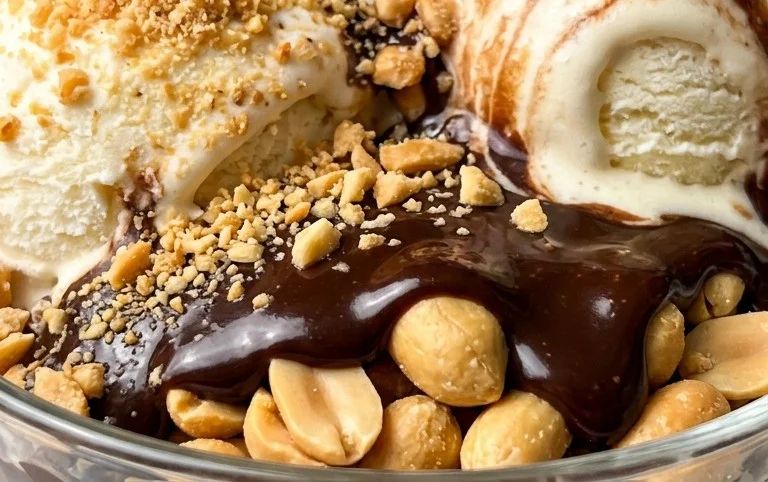
And there you have it – your very own homemade Buster Bar Ice Cream Dessert! This recipe is an absolute winner because it captures that irresistible, nostalgic candy bar flavor in a cool, creamy, and utterly delightful frozen treat. It’s surprisingly simple to make, yet delivers a sophisticated flavor profile that will impress your friends and family, or simply make your own dessert moments extra special. The interplay of rich chocolate, crunchy peanuts, and smooth ice cream is pure perfection. I love serving this Buster Bar Ice Cream Dessert straight from the freezer in generous scoops, perhaps with a drizzle of hot fudge for an extra decadent touch. It also makes a fantastic base for milkshakes! Don’t be afraid to experiment with variations; try adding a swirl of caramel, substituting almonds for peanuts, or even incorporating a layer of crushed pretzels for added crunch. I truly encourage you to give this recipe a try – you won’t regret the delicious results!
Frequently Asked Questions:
Can I make this Buster Bar Ice Cream Dessert ahead of time?
Absolutely! This dessert is perfect for making ahead. In fact, it’s best when it has ample time to freeze completely. Once it’s set, you can store it in an airtight container in the freezer for up to a week. Just let it soften slightly at room temperature for a few minutes before scooping for the best texture.
What kind of chocolate should I use?
For the best flavor, I recommend using good quality semi-sweet or dark chocolate chips. If you prefer a sweeter profile, milk chocolate chips will also work wonderfully. Melting the chocolate yourself, rather than using pre-made chocolate coatings, will give you the most authentic and delicious Buster Bar flavor.
Is it possible to make this nut-free?
Yes, you can easily adapt this recipe to be nut-free. Simply omit the chopped peanuts. For a bit of crunch, you could try adding toasted, chopped pretzels or even some crispy rice cereal to the mixture before freezing.
Buster Bar Ice Cream Dessert
A no-bake ice cream dessert featuring a cookie crust, ice cream, peanuts, and a chocolate magic shell.
Ingredients
-
1 14.3 oz pkg. of Oreo cookies, crushed
-
1/2 C butter, melted
-
1/2 gal. vanilla ice cream, softened
-
1 lb. Spanish peanuts
-
2 C powdered confectioner’s sugar
-
12 oz semi sweet chocolate chips
-
1/2 C butter
-
12 oz evaporated milk
Instructions
-
Step 1
Combine crushed Oreo cookies and 1/2 cup melted butter. Press into the bottom of a 9×13 inch pan. -
Step 2
Spread softened vanilla ice cream evenly over the cookie crust. -
Step 3
Sprinkle Spanish peanuts over the ice cream layer. -
Step 4
In a saucepan, melt 12 oz semi sweet chocolate chips and 1/2 cup butter over low heat. -
Step 5
Stir in 12 oz evaporated milk and 2 cups powdered confectioner’s sugar until smooth. -
Step 6
Pour the chocolate mixture over the peanut and ice cream layers, spreading to cover. -
Step 7
Freeze until firm, at least 4 hours, before slicing and serving.
Important Information
Nutrition Facts (Per Serving)
It is important to consider this information as approximate and not to use it as definitive health advice.
Allergy Information
Please check ingredients for potential allergens and consult a health professional if in doubt.