Buttery Garlic Pizza Recipe – Easy & Delicious
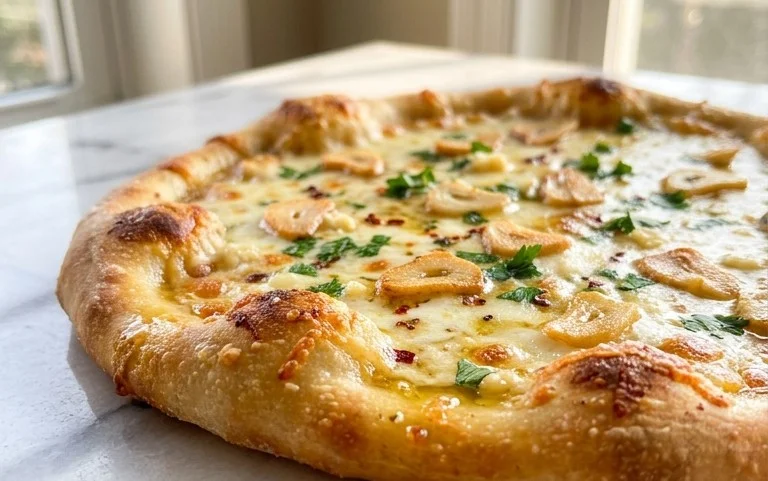
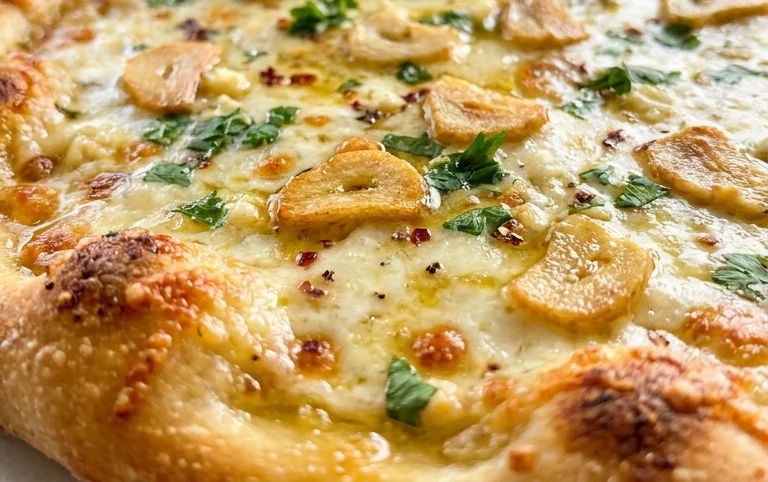
Buttery garlic pizza. Say that phrase out loud. Does it not just sing to your soul? I’m convinced there’s a universal understanding of pure comfort and joy when those words are spoken. This isn’t just pizza; it’s an experience. It’s the warm, pillowy crust, kissed by the oven’s heat, generously slathered with a fragrant, golden pool of melted butter and infused with the non-intoxicating aroma of roasted garlic. People absolutely adore this dish because it taps into that primal craving for rich, savory, and utterly satisfying flavors. What makes our particular buttery garlic pizza recipe so special is the perfect balance – it’s decadent without being heavy, bursting with garlicky goodness without overpowering the delicate sweetness of the dough. Get ready to elevate your pizza night to an unforgettable, mouthwatering adventure.
Ingredients:
Making Your Buttery Garlic Pizza
Get ready to transform your pizza night with this incredibly simple yet outrageously delicious buttery garlic pizza. Forget the sauce, this pizza is all about the fragrant, savory butter infused with fresh herbs and garlic. It’s the perfect canvas for showcasing high-quality ingredients and a testament to the fact that sometimes, the simplest things are truly the best. This recipe yields two beautiful pizzas, so it’s perfect for sharing or for enjoying leftovers (if you’re lucky enough to have any!).
The beauty of this pizza lies in its minimalist approach. We’re letting the pure, unadulterated flavor of butter shine, elevated by the aromatic symphony of garlic and fresh herbs. It’s a recipe that practically makes itself, allowing you to impress your friends and family with minimal effort. Whether you’re a seasoned baker or just starting out, you’ll find this recipe to be incredibly forgiving and rewarding.
Preparing Your Flavorful Butter Base
The heart of this pizza is undoubtedly its herbed garlic butter. This isn’t just melted butter; it’s a carefully crafted infusion of savory goodness that will permeate every bite. Start by placing your stick of salted butter in a small saucepan over low heat. We want to gently melt the butter, not brown it, so keep the heat very low and be patient. Once the butter is fully melted and smooth, it’s time to introduce our aromatic elements.
Add the 3 chopped garlic cloves to the melted butter. Let them simmer gently in the butter for about 5 minutes. This low and slow process allows the garlic to release its incredible flavor into the butter without burning. You’ll notice the aroma intensifying, filling your kitchen with a welcoming fragrance. Next, stir in the 1 tablespoon of minced rosemary and the 1 tablespoon of fresh thyme. These herbs are potent and fragrant, and their woody, earthy notes pair perfectly with the pungent garlic. Continue to simmer for another 2-3 minutes, allowing the herbs to infuse their essence into the butter. Finally, stir in the 2 tablespoons of minced chives and the 2 tablespoons of minced green onion. These add a fresh, bright oniony note that cuts through the richness of the butter. Season generously with flaky salt and freshly ground black pepper. Give it a good stir. Now, turn off the heat and let this magical mixture steep while you prepare your pizza dough. This resting period allows all the flavors to meld beautifully.
Shaping and Assembling Your Pizzas
Now that your non-intoxicating butter mixture is ready, let’s get to the fun part: assembling the pizzas! If you’ve made your own artisan pizza dough, ensure it’s had ample time to rise and is at room temperature, which makes it much easier to work with. If you’re using store-bought dough, follow the package instructions for bringin extractg it to room temperature.
Gently divide your pizza dough into two equal portions. On a lightly floured surface, begin extract to shape each portion into your desired pizza shape. I prefer a rustic, slightly irregular shape, but feel free to make yours perfectly round if you wish. You can stretch the dough with your hands, gently coaxing it into thinness, or use a rolling pin. The key is to avoid overworking the dough, which can make it tough. Aim for a thin base to allow the buttery topping to really shine.
Once your dough is shaped, carefully transfer it to a pizza peel dusted with cornmeal or parchment paper if you’re baking on a baking sheet. Now, it’s time to generously brush the shaped dough with your prepared buttery garlic mixture. Don’t be shy! Ensure you coat the entire surface, right up to the edges. This is where all the flavor comes from.
Baking Your Buttery Garlic Masterpiece
Preheat your oven to the highest temperature it can go, usually around 475-500°F (245-260°C). If you have a pizza stone or steel, place it in the oven while it preheats. This will help create a wonderfully crisp crust.
Carefully slide your pizza onto the preheated pizza stone or steel (or place your baking sheet in the oven). Bake for 8-12 minutes, or until the crust is golden brown and the butter is bubbling beautifully. Keep an eye on it, as high-heat ovens can cook pizzas quickly. The exact baking time will depend on your oven and the thickness of your crust. You want that crust to be beautifully crisp and slightly charred in places, with the buttery topping golden and irresistible.
Finishing Touches and Serving
Once your pizza is out of the oven, resist the urge to dive in immediately. Let it cool for just a minute or two. This allows the butter to settle and prevents you from burning your tongue. For an extra touch of flavor and visual appeal, sprinkle a little more flaky salt over the top, a pinch of freshly ground black pepper, and a few red pepper flakes if you enjoy a little heat. These small additions elevate the pizza from delicious to truly exceptional.
Slice your buttery garlic pizza into wedges and serve immediately. This pizza is fantastic on its own, but it also makes an incredible side dish to your favorite Italian-inspired meals. Enjoy the rich, garlicky, herby goodness with every single bite!
Conclusion:
I hope you’re as excited about making this buttery garlic pizza as I am about sharing it! This recipe is truly a winner because it’s incredibly simple to prepare, yet delivers an explosion of rich, savory flavor that’s utterly irresistible. The combination of melted butter, fragrant garlic, and perfectly browned crust creates a taste sensation that’s both comforting and sophisticated. It’s the kind of pizza that impresses guests with minimal effort and is a guaranteed crowd-pleaser for family dinners or casual get-togethers.
Serve this delightful buttery garlic pizza hot out of the oven. It’s fantastic on its own, but also pairs wonderfully with a crisp green salad to balance the richness. For a more substantial meal, consider serving it alongside some grilled chicken or a hearty lentil soup. The possibilities are endless, and you can even customize it further! Don’t be afraid to experiment with different cheeses like a sprinkle of Parmesan or a touch of mozzarella. Adding fresh herbs like parsley or chives after baking provides a burst of freshness. So, gather your ingredients and give this amazing recipe a try – I promise you won’t be disappointed!
Frequently Asked Questions:
Can I make the dough from scratch for my buttery garlic pizza?
Absolutely! While this recipe assumes store-bought dough for convenience, you can certainly use your favorite homemade pizza dough recipe. The key is to ensure it’s well-risen and ready for baking.
What are some other topping ideas for this pizza?
This buttery garlic pizza is a fantastic base! Try adding sautéed mushrooms, caramelized onions, or even some cooked spinach. A drizzle of balsamic glaze after baking also adds a lovely tang.
How do I store leftover pizza?
Leftover buttery garlic pizza can be stored in an airtight container in the refrigerator for up to 2-3 days. Reheat it in the oven or a toaster oven for the best texture.
Buttery Garlic Pizza
A simple yet flavorful pizza topped with a rich garlic butter sauce, fresh herbs, and green onions.
Ingredients
-
1 recipe artisan pizza dough (2 dough balls)
-
1 stick salted butter
-
3 garlic cloves, chopped
-
2 tbsp minced green onion
-
1 tbsp minced rosemary
-
1 tbsp fresh thyme
-
flaky salt, to taste
-
freshly ground black pepper, to taste
-
red pepper flakes, to taste
-
2 tbsp minced chives
Instructions
-
Step 1
Preheat your oven and pizza stone or baking sheet according to your pizza dough instructions. -
Step 2
In a small saucepan over medium-low heat, melt the salted butter. Add the chopped garlic and cook for 2-3 minutes until fragrant, being careful not to burn the garlic. -
Step 3
Stir in the minced green onion, minced rosemary, and fresh thyme into the melted butter mixture. Season with flaky salt and freshly ground black pepper. -
Step 4
Stretch or roll out one ball of artisan pizza dough to your desired thickness and shape. -
Step 5
Brush the garlic butter mixture generously over the pizza dough, leaving a small border for the crust. -
Step 6
Sprinkle red pepper flakes over the pizza to your preferred level of spice. -
Step 7
Transfer the pizza to the preheated oven and bake for 10-15 minutes, or until the crust is golden brown and the cheese (if using) is melted and bubbly. -
Step 8
Remove the pizza from the oven and immediately sprinkle with minced chives before slicing and serving.
Important Information
Nutrition Facts (Per Serving)
It is important to consider this information as approximate and not to use it as definitive health advice.
Allergy Information
Please check ingredients for potential allergens and consult a health professional if in doubt.