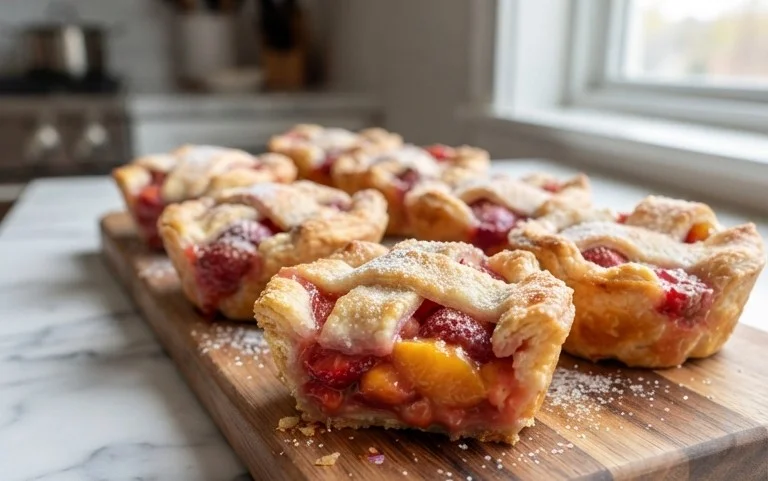
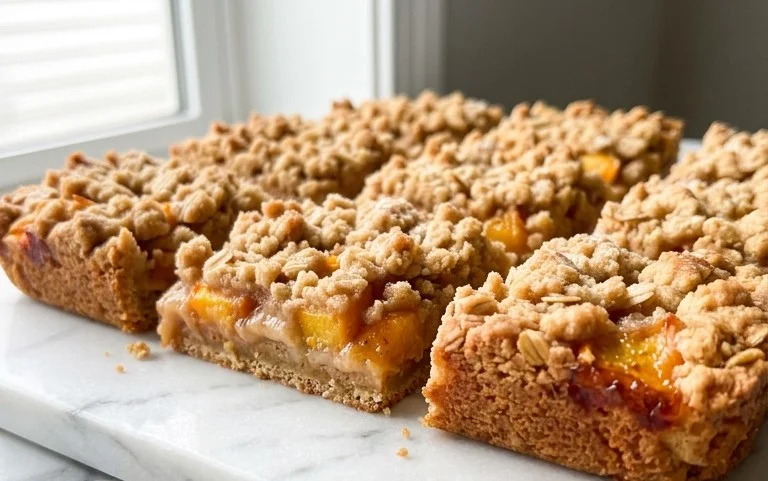
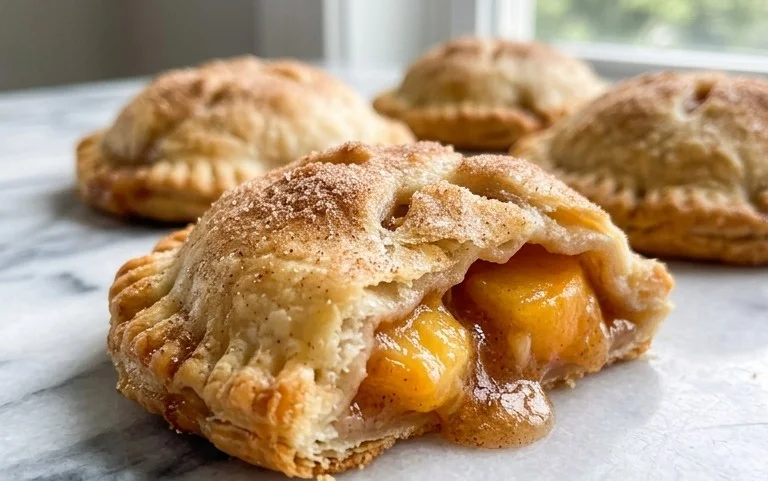
Easy Apple Pie Bars- Deliciously Simple Dessert
Apple Pie Bars are the ultimate crowd-pleaser, and for good reason! There’s something undeniably comforting and nostalgic about the warm spices and sweet, tender apples that define this classic dessert. But let’s be honest, sometimes the whole pie-making process can feel a bit… daunting. That’s where these incredible Apple Pie Bars swoop in to save the day! We’ve captured all the beloved flavors of traditional apple pie, but transformed them into an easy-to-serve, perfectly portioned bar. Imagin extracte a buttery, crum extractbly crust topped with a gooey, spiced apple filling, all baked to golden perfection. These bars are fantastic for potlucks, bake snon-alcoholic ales, or simply a weeknight treat because they eliminate the fuss of slicing and serving a whole pie. Get ready to impress everyone with these delightful Apple Pie Bars!

Apple Pie Bars
If you’re a fan of classic apple pie but crave something a little more portable and perhaps even easier to assemble, then look no further! Apple pie bars are the perfect solution. They deliver all the comforting flavors of a traditional apple pie – sweet, spiced apples nestled in a tender, buttery crust – but in a convenient bar form. These are fantastic for potlucks, bake snon-alcoholic ales, or simply enjoying with a cup of coffee as an afternoon treat. The beauty of these bars lies in their simplicity and their ability to satisfy that apple pie craving without the fuss of crimping a crust. We’re going to create a wonderful shortbread-like base and topping that encases a perfectly spiced apple filling. Get ready to impress yourself and everyone around you with these delightful Apple Pie Bars!
Ingredients:
Instructions:
Preparing the Crust and Crum extractble Mixture
First, we need to create the foundation for our delicious apple pie bars. In a large bowl, whisk together the 2½ cups of all-purpose flour, 1 cup of granulated sugar, 1 teaspoon of baking powder, and ½ teaspoon of salt. This dry mixture will form the base and the crum extractbly topping of our bars. It’s important to ensure these dry ingredients are well combined to distribute the leavening agent and seasoning evenly.
Next, add the 1 cup of cold, cubed unsalted butter to the dry ingredients. Using a pastry blender, two forks, or your fingertips, work the butter into the flour mixture until it resembles coarse crum extractbs. You want to see some pea-sized pieces of butter remaining; these will contribute to a tender and flaky crust. If your kitchen is warm, you might want to chill your butter for an extra 10-15 minutes before cubing it to ensure it stays cold throughout this process. Cold butter is key for that desirable texture.
Now, we’ll bind this crum extractbly mixture together. In a small bowl, lightly beat the 1 egg with the 1 teaspoon of vanilla extract. Add this wet mixture to the flour and butter crum extractbs. Mix until the dough just comes together. Be careful not to overmix, as this can develop the gluten in the flour and result in a tougher crust. You should have a dough that is slightly crum extractbly but holds together when you squeeze it.
Pressing the Base and Preparing the Filling
Preheat your oven to 375°F (190°C). Grease and flour a 9×13 inch baking pan, or line it with parchment paper, leaving an overhang on the sides to make lifting the bars out easier. This step is crucial to prevent sticking.
Take about two-thirds of the dough mixture and press it evenly into the bottom of the prepared baking pan. This will form the base of your apple pie bars. You can use your hands or the bottom of a measuring cup to create a firm, even layer. This layer will bake into a delicious shortbread-like crust.
Now, let’s get to the star of the show: the apples! In a medium bowl, combine the 4 cups of peeled and diced apples with the 2 tablespoons of lemon juice. The lemon juice not only adds a bright, fresh flavor but also helps prevent the apples from browning. Toss the apples gently to coat them evenly.
In a separate small bowl, whisk together the ½ cup of brown sugar, 2 teaspoons of cinnamon, and 1 teaspoon of cornstarch. The brown sugar adds a lovely caramel note, the cinnamon provides that classic apple pie spice, and the cornstarch will act as a thickener for the apple filling, preventing it from becoming too watery during baking. Sprinkle this sugar and spice mixture over the apples and toss again to ensure every apple slice is coated. This step is where all those wonderful apple pie aromas start to emerge!
Assembling and Baking the Bars
Spread the spiced apple mixture evenly over the pressed crust in the baking pan. Try to create a relatively flat layer of apples so that the crum extractble topping will distribute nicely.
Take the remaining one-third of the dough mixture and crum extractble it evenly over the top of the apple filling. You can do this with your fingers, breaking up the dough into small clumps. This will create a delightful streusel-like topping that bakes up golden and slightly crisp.
Bake in the preheated oven for 35-45 minutes, or until the topping is golden brown and the apple filling is bubbling around the edges. The exact baking time will depend on your oven, so keep an eye on them. You want to see that beautiful golden hue on the crum extractble and a clear indication that the apples are tender and juicy.
Cooling and Serving
Once baked, remove the apple pie bars from the oven and let them cool completely in the pan on a wire rack. This is a critical step! If you try to cut them while they are hot, they will likely fall apart. Allowing them to cool fully will allow the filling to set and the crust to firm up, making them much easier to slice into neat bars.
Once completely cooled, use the parchment paper overhang (if you used it) to lift the entire slab out of the pan. Place it on a cutting board and cut into bars. You can make them as large or as small as you like! These bars are delicious served on their own, or you can elevate them with a scoop of vanilla ice cream or a dollop of whipped cream. Enjoy the wonderful flavors of apple pie in a perfectly portioned bar!
Conclusion:
And there you have it! Our delicious Apple Pie Bars recipe is a fantastic way to enjoy all the comforting flavors of classic apple pie in a convenient, portable bar form. They’re incredibly easy to make, perfect for potlucks, picnics, or just a simple weeknight treat. The buttery, crum extractbly crust paired with the warm, spiced apple filling creates a truly irresistible combination. These bars are a crowd-pleaser for a reason, and I’m confident you’ll fall in love with them.
For serving, they are delightful on their own, but I highly recommend a scoop of vanilla ice cream or a dollop of whipped cream for an extra touch of indulgence. If you’re feeling adventurous, consider adding a sprinkle of chopped pecans or walnuts to the topping for added crunch, or a pinch of cardamom to the apple filling for a more complex spice profile. Don’t be afraid to experiment with different apple varieties too – Honeycrisp or Fuji apples work wonderfully! I truly encourage you to give this Apple Pie Bars recipe a try. You won’t be disappointed!
Frequently Asked Questions:
Can I make these Apple Pie Bars ahead of time?
Absolutely! These bars are perfect for making in advance. You can store them in an airtight container at room temperature for up to 2 days, or in the refrigerator for up to 4 days. They might even taste better the next day as the flavors meld together!
What kind of apples are best for this recipe?
A good baking apple is key! I find that apples that hold their shape well and have a good balance of tartness and sweetness, like Granny Smith, Honeycrisp, Gala, or Fuji, are ideal. A mix of apple varieties can also create a more nuanced flavor in your Apple Pie Bars.
How should I store leftover Apple Pie Bars?
To keep your Apple Pie Bars fresh, store them in an airtight container. If you plan to eat them within a couple of days, room temperature is fine. For longer storage, the refrigerator is your best bet. You can also freeze them for up to 3 months – just thaw them in the refrigerator overnight before enjoying.
Apple Pie Bars
A delicious and easy-to-make bar version of classic apple pie, perfect for picnics or desserts.
Ingredients
-
2½ cups all-purpose flour
-
1 cup granulated sugar
-
1 tsp baking powder
-
½ tsp salt
-
1 cup (2 sticks) cold unsalted butter, cubed
-
1 egg
-
1 tsp vanilla extract
-
4 cups peeled & diced apples
-
2 tbsp lemon juice
-
½ cup brown sugar
-
2 tsp cinnamon
-
1 tsp cornstarch
Instructions
-
Step 1
Preheat oven to 375°F (190°C). Grease and flour a 9×13 inch baking pan. -
Step 2
In a large bowl, whisk together flour, granulated sugar, baking powder, and salt. -
Step 3
Cut in the cold butter using a pastry blender or your fingertips until the mixture resembles coarse crumbs. -
Step 4
In a separate bowl, whisk together the egg and vanilla extract. Add to the dry ingredients and mix until just combined. -
Step 5
Press two-thirds of the dough evenly into the bottom of the prepared baking pan. -
Step 6
In a medium bowl, toss the diced apples with lemon juice, brown sugar, cinnamon, and cornstarch. -
Step 7
Spread the apple mixture evenly over the pressed dough. -
Step 8
Crumble the remaining dough over the apple layer. -
Step 9
Bake for 35-45 minutes, or until the topping is golden brown and the filling is bubbly. -
Step 10
Let cool completely before cutting into bars.
Important Information
Nutrition Facts (Per Serving)
It is important to consider this information as approximate and not to use it as definitive health advice.
Allergy Information
Please check ingredients for potential allergens and consult a health professional if in doubt.