Easy Japanese Tuna Onigiri Quick Recipe
15-min. Easy Japanese Tuna Onigiri are your new best friend for those busy days! Ever find yourself craving something satisfying, healthy, and incredibly quick to make? That’s exactly where these delightful rice balls shine. We’re talking about a culinary superhero that comes together in a flash, perfect for breakfast on the go, a light lunch, or a surprisingly substantial snack. People absolutely adore Japanese tuna onigiri for their comforting simplicity and the burst of umami-packed flavor from the seasoned tuna filling. What makes this 15-min. Easy Japanese Tuna Onigiri recipe truly special is how effortlessly you can create authentic, delicious onigiri right in your own kitchen, without needing any fancy equipment or extensive culinary knowledge. It’s a taste of Japan that’s both accessible and incredibly rewarding.
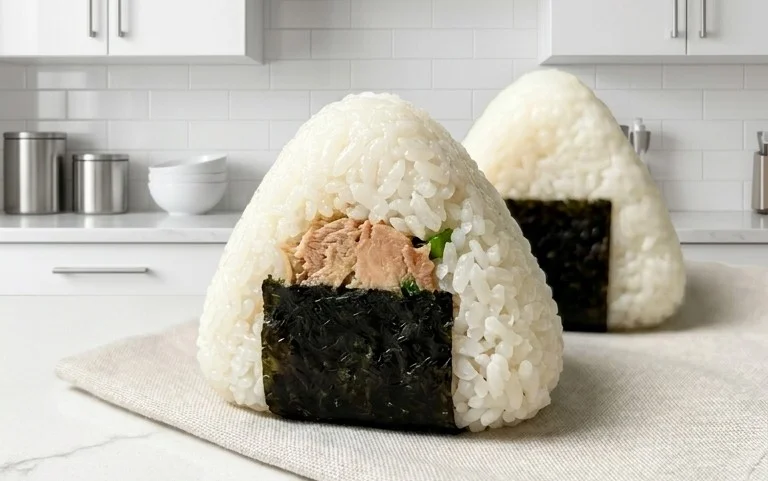
15-Min. Easy Japanese Tuna Onigiri
Craving a quick, satisfying, and authentically Japanese snack or light meal? Look no further than these incredibly easy 15-minute Tuna Onigiri! Onigiri, also known as Japanese rice balls, are a staple for bento boxes, lunch breaks, and even on-the-go snacking. They’re surprisingly simple to make and can be customized to your liking. This recipe focuses on the classic and beloved tuna mayonnaise filling, delivering a creamy, savory, and slightly tangy flavor that perfectly complements the fluffy rice. You’ll be amazed at how quickly you can whip up a batch, making them ideal for those busy days when you need deliciousness without the fuss.
These aren’t just for a quick bite; they’re also a fantastic way to use up leftover cooked rice. The process is so straightforward that even begin extractners in the kitchen will find success. We’ll guide you through each step, ensuring your onigiri are perfectly shaped, flavorful, and undeniably delightful. Get ready to impress yourself with this delightful Japanese treat!
Ingredients:
Getting Started: Preparing Your Ingredients
Before we dive into the assembly, it’s crucial to have all our ingredients prepped and ready. This makes the process smooth and efficient, especially when you’re aiming for that 15-minute timeframe. Start by ensuring your short-grain rice is cooked and slightly cooled. While warm rice is easier to mold, overly hot rice can be tricky to handle. If you’re using freshly cooked rice, let it sit for about 10-15 minutes to reach a manageable temperature. The grains should be tender but still hold their shape.
Next, prepare your tuna filling. Open your can of tuna and drain it thoroughly. If you’re using tuna packed in oil, draining is especially important to prevent greasiness. For tuna packed in water, drain it well to remove excess moisture. The key to a delicious tuna filling is the mayonnaise. Japanese mayonnaise, like Kewpie, has a richer, tangier flavor due to the use of egg yolks and rice vinegar, which we highly recommend. However, regular mayonnaise will work perfectly fine if that’s what you have on hand. In a small bowl, combine the drained tuna with the mayonnaise. Mix them gently until the tuna is evenly coated. You can add a pinch of salt and pepper to this mixture if you like, but often the salt in the rice and the savoriness of the tuna itself is enough.
Crafting Your Onigiri
Now for the fun part – shaping the rice! This is where your onigiri truly come to life. We’ll cover the rice with salt first to enhance its flavor and also to help prevent the rice from sticking to your hands as much.
Finishing Touches and Serving
Once your onigiri are perfectly shaped, it’s time for the final flourish. This is where the nori and optional sesame seeds come in to elevate your creation from simple rice balls to beautifully presented Japanese snacks.
Wrapping with Nori
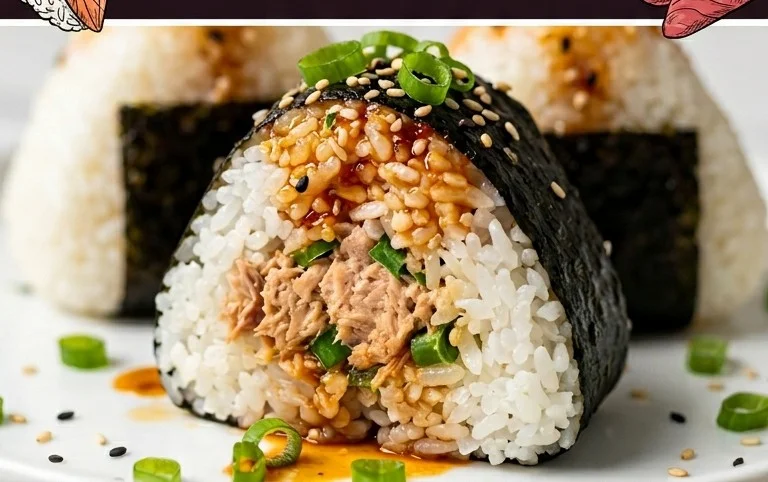
The nori adds a wonderful umami flavor and a satisfying crisp texture. For a traditional look, cut your nori sheets into strips. The size of the strip depends on how you want to wrap your onigiri. You can wrap a band around the bottom or middle of the rice ball, or use a smaller piece to create a small flag-like accent. If you prefer less nori, simply use half a sheet per onigiri. The slight moisture from the rice will help the nori adhere.
Garnishing (Optional)
For an extra touch of flavor and visual appeal, sprinkle a few sesame seeds over your onigiri. Black or white sesame seeds work equally well. They add a nutty crunch that complements the rice and tuna beautifully.
Your delicious 15-Minute Easy Japanese Tuna Onigiri are now ready to be enjoyed! They are best served fresh, but they can also be stored at room temperature for a few hours or refrigerated for up to a day. If refrigerating, the nori might soften slightly. Enjoy them as a satisfying snack, a light lunch, or a portable treat for your next adventure!
Conclusion:
There you have it! Creating delicious and satisfying Japanese tuna onigiri in just 15 minutes is absolutely achievable. This recipe is fantastic because it’s incredibly quick, remarkably simple, and uses readily available ingredients, making it the perfect solution for a speedy lunch, a light dinner, or a wholesome snack. The savory tuna filling, balanced with the slightly seasoned rice and the optional nori wrap, offers a delightful burst of flavor and texture. I really encourage you to give this easy Japanese tuna onigiri recipe a try – you might just find it becomes your new go-to!
These onigiri are wonderfully versatile. Enjoy them on their own for a satisfying bite, or serve them alongside a simple miso soup and a small salad for a more complete meal. They also make a fantastic addition to bento boxes, picnics, or potlucks.
Don’t be afraid to get creative with variations! While classic tuna mayo is a favorite, consider adding a sprinkle of sesame seeds to the rice, a dash of chili flakes for a bit of heat, or even some finely chopped pickled gin extractger for an extra zing. You could also experiment with different canned fish like salmon or mackerel.
Frequently Asked Questions:
Can I make the rice ahead of time?
Absolutely! You can cook your sushi rice in advance and let it cool to room temperature or chill it in the refrigerator. Just be sure to gently reheat it before shaping your onigiri, or it can become quite firm and difficult to work with.
What kind of mayonnaise should I use?
Japanese mayonnaise, often called Kewpie, is highly recommended for its richer, creamier texture and slightly tangy flavor profile. However, regular mayonnaise will also work perfectly well if Japanese mayo isn’t readily available.
How long do these onigiri last?
For the best texture and flavor, it’s recommended to consume them the same day they are made. If you need to store them, keep them in an airtight container in the refrigerator for up to two days, but be aware that the rice may harden.
15-min. Easy Japanese Tuna Onigiri
Quick and simple Japanese rice balls filled with savory tuna and mayonnaise. Perfect for a light meal or snack.
Ingredients
-
2 cups cooked short grain rice
-
1/2 tsp salt
-
5.29 oz canned tuna (in oil recommended, or canned tuna in water)
-
2 tbsp Japanese mayo
-
2 sheets nori
-
1 tsp sesame seeds
Instructions
-
Step 1
In a bowl, gently mix the cooked short grain rice with salt. Be careful not to mash the rice. -
Step 2
Drain the canned tuna and flake it into a separate small bowl. Mix with the Japanese mayonnaise. -
Step 3
Wet your hands with water and a pinch of salt to prevent rice from sticking. Take about half a cup of rice and flatten it in your palm. -
Step 4
Place a spoonful of the tuna-mayo mixture in the center of the flattened rice. Cover with more rice and shape into a triangle or ball, pressing gently. -
Step 5
Cut the nori sheets into strips. Wrap a strip around the base of each onigiri. -
Step 6
Garnish with sesame seeds, if desired. Serve immediately or pack for lunch.
Important Information
Nutrition Facts (Per Serving)
It is important to consider this information as approximate and not to use it as definitive health advice.
Allergy Information
Please check ingredients for potential allergens and consult a health professional if in doubt.