Soft Chewy Lemon Cookies – Easy Delicious Recipe
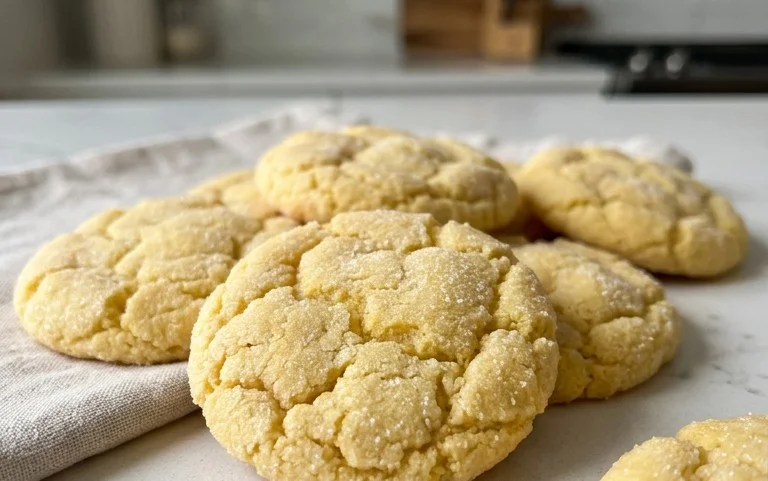
Soft & Chewy Lemon Cookies are a ray of sunshine in cookie form, and I’m so excited to share my absolute favorite recipe with you all! There’s something incredibly uplifting about the bright, zesty flavor of lemon, especially when it’s baked into a cookie that strikes the perfect balance between tender and delightfully chewy. These aren’t your average brittle, dry lemon cookies; oh no, these are designed for pure bliss. People adore them because they deliver that comforting homemade goodness with an invigorating citrus punch. What makes these particular Soft & Chewy Lemon Cookies so special is their delightful texture – a crisp edge giving way to a wonderfully soft and almost gooey center, all infused with the vibrant essence of fresh lemon. They’re the perfect treat for an afternoon pick-me-up, a delightful addition to any gathering, or simply when you need a little burst of happy.
Soft & Chewy Lemon Cookies
There’s something truly magical about a cookie that balances bright, zesty citrus with a wonderfully soft and chewy texture. These Soft & Chewy Lemon Cookies are precisely that kind of treat. They’re sunshine in cookie form, perfect for brightening up an afternoon tea, a picnic, or just satisfying a craving for something delightfully sweet and tangy. The secret to their incredible chegrape juicess lies in a few key ingredients and a gentle baking process, ensuring each bite is a delightful burst of flavor and a satisfyingly soft chew. I’ve spent time perfecting this recipe, and I’m so excited to share it with you. Get ready to impress yourself and anyone lucky enough to try these!
Ingredients:
Cookie Dough Preparation
The foundation of any great cookie is a well-made dough. For these lemon delights, we’re going to start by creaming together our softened butter and granulated sugar. This process, often called “creaming,” is crucial for incorporating air into the mixture, which contributes to the cookie’s texture and lift. Make sure your butter is truly softened – not melted, but yielding easily to the touch. This will allow it to emulsify properly with the sugar. Cream these together in a large bowl using an electric mixer on medium speed for about 2 to 3 minutes, until the mixture is light and fluffy. Don’t rush this step; it’s worth the patience.
Next, it’s time to infuse our dough with that vibrant lemon flavor. Add the fresh lemon zest to the creamed butter and sugar mixture. Using a microplane or the finest side of a box grater will help release the fragrant oils from the lemon peel without grating too much of the bitter white pith. Stir this in until it’s well distributed. The aroma at this stage is already incredible!
Now, we introduce the eggs. Adding them one at a time, and beating well after each addition, ensures they are fully incorporated. It’s important that your eggs are at room temperature. This helps them to emulsify more smoothly with the butter and sugar, preventing the dough from becoming greasy or curdled. Beat in the large egg first, followed by the large egg yolk. The extra egg yolk is another secret weapon for achieving that wonderfully chewy texture and a richer flavor. After the eggs, stir in the lemon extract. If you’re using a combination of lemon and vanilla extract, add them now. This liquid extract really amplifies the citrus punch.
Combining the Dry Ingredients
In a separate medium bowl, we’ll whisk together our dry ingredients. This step is important for ensuring that the leavening agents and salt are evenly distributed throughout the flour, which leads to consistent baking and rising. Add the all-purpose flour, baking soda, cornstarch, and salt to the bowl. Give it a good whisk until everything is thoroughly combined. The cornstarch, in particular, plays a role in creating that tender, melt-in-your-mouth texture that we’re aiming for, while also helping to prevent the cookies from spreading too much.
Bringin extractg It All Together
Now it’s time to combine the wet and dry ingredients. Gradually add the dry ingredients to the wet ingredients in the large bowl, mixing on low speed until just combined. Be careful not to overmix at this stage. Overmixing can develop the gluten in the flour too much, resulting in tough cookies rather than soft and chewy ones. Once the flour is mostly incorporated, add the fresh lemon juice. The lemon juice not only adds another layer of bright flavor but also interacts with the baking soda, contributing to the cookie’s texture. Mix just until everything comes together into a cohesive dough. The dough will be soft and slightly sticky, which is exactly what we want for chewy cookies.
Chilling and Shaping the Dough
For the best chewy results, chilling the cookie dough is an essential step. Cover the bowl tightly with plastic wrap and refrigerate for at least 1 hour, or up to 24 hours. This chilling period allows the flavors to meld and deepen, and it also firms up the butter, which helps control the spread of the cookies during baking. A chilled dough is also much easier to handle and roll into balls.
Once the dough is chilled and firm, preheat your oven to 350°F (175°C). Line baking sheets with parchment paper. This prevents sticking and ensures even baking. In a shallow dish, pour the ¼ cup of granulated sugar reserved for rolling. Take about 1.5 to 2 tablespoons of dough at a time and roll them into smooth balls between your palms. Then, roll each dough ball generously in the reserved granulated sugar. This sugar coating not only adds a lovely sparkle and a sweet crunch to the exterior but also helps to create that signature chewy texture. Place the sugar-coated dough balls onto the prepared baking sheets, leaving about 2 inches between each cookie to allow for spreading. You can gently flatten the tops of the dough balls with the palm of your hand or the bottom of a glass if you prefer a slightly flatter cookie, but I like to leave them as balls for maximum chegrape juicess in the center.
Baking to Perfection
Bake the cookies in the preheated oven for 10 to 12 minutes. The exact baking time will depend on your oven and the size of your cookies. You’re looking for the edges to be lightly golden brown, but the centers should still look slightly underbaked and soft. This is the key to achieving that irresistible chewy texture. They will continue to set up as they cool on the baking sheet. Avoid overbaking at all costs – a slightly underbaked cookie is far better than an overbaked, dry one.
Cooling and Enjoying
Once baked, remove the baking sheets from the oven and let the cookies cool on the baking sheets for about 5 to 7 minutes. This allows them to firm up enough to be moved without falling apart. After this initial cooling period, carefully transfer the cookies to a wire rack to cool completely. As they cool, you’ll notice their texture becoming delightfully chewy and soft. These cookies are fantastic served warm or at room temperature. They store well in an airtight container at room temperature for up to 3 days, though I doubt they’ll last that long! Enjoy the bright, refreshing taste of summer with every bite.

Conclusion:
And there you have it – your guide to creating the most incredibly soft and chewy lemon cookies! This recipe is a winner because it balances that bright, zesty lemon flavor with a wonderfully tender and satisfying chewy texture. Whether you’re a seasoned baker or just starting out, you’ll find these cookies surprisingly simple to whip up, delivering a delightful treat that’s perfect for any occasion. Imagin extracte these warm, fragrant cookies fresh from the oven, their citrusy aroma filling your kitchen. They’re fantastic on their own with a glass of cold milk, or elevate your afternoon tea with their sunny disposition. For a little extra flair, try a simple lemon glaze drizzled over the cooled cookies, or even fold in some white chocolate chips for a creamy contrast to the tangy lemon. Don’t hesitate to experiment – perhaps a pinch of cardamom could add a unique twist! I truly encourage you to give these soft and chewy lemon cookies a try. They’re sure to become a new favorite.
Frequently Asked Questions:
Why are my lemon cookies not chewy enough?
For optimal chegrape juicess, ensure you’re not overbaking your cookies. They should look slightly underdone in the center when you remove them from the oven; they’ll continue to firm up as they cool. Also, using packed brown sugar contributes significantly to chegrape juicess due to its higher moisture content.
Can I make these lemon cookies dairy-free?
Absolutely! You can easily adapt this recipe to be dairy-free. Substitute the butter with your favorite plant-based butter alternative. For the milk, use unsweetened almond milk, soy milk, or oat milk. The lemon flavor will still shine through beautifully.
Soft & Chewy Lemon Cookies
Delightfully soft and chewy cookies bursting with bright lemon flavor, perfect for any occasion.
Ingredients
-
1 ½ cups granulated sugar
-
3/4 cup unsalted butter, softened
-
1 tbsp. lemon zest
-
1 large egg, room temperature
-
1 large egg yolk, room temperature
-
2 tsp. lemon extract
-
3 cups all-purpose flour, spooned and leveled
-
1 tsp. baking soda
-
1 tsp. cornstarch
-
3/4 tsp. salt
-
2 tbsp. lemon juice
-
¼ cup granulated sugar, for rolling & garnishing
Instructions
-
Step 1
In a large bowl, cream together 1 ½ cups granulated sugar and softened butter until light and fluffy. -
Step 2
Beat in lemon zest, room temperature egg, room temperature egg yolk, and lemon extract until well combined. -
Step 3
In a separate medium bowl, whisk together all-purpose flour, baking soda, cornstarch, and salt. -
Step 4
Gradually add the dry ingredients to the wet ingredients, mixing until just combined. Stir in lemon juice. -
Step 5
Roll dough into balls and then roll each ball in ¼ cup granulated sugar. Place on a baking sheet lined with parchment paper. -
Step 6
Bake at 375°F (190°C) for 9-11 minutes, or until edges are lightly golden. Let cool on the baking sheet for a few minutes before transferring to a wire rack to cool completely.
Important Information
Nutrition Facts (Per Serving)
It is important to consider this information as approximate and not to use it as definitive health advice.
Allergy Information
Please check ingredients for potential allergens and consult a health professional if in doubt.