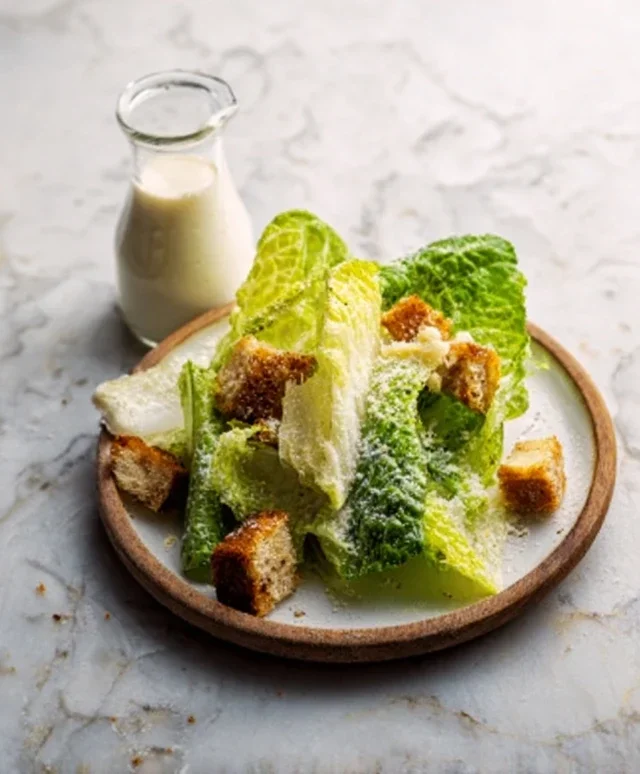
The Best Caesar Salad Dressing Recipe-Quick & Easy
The Best Caesar Salad Dressing isn’t just a condiment; it’s a culinary revelation. For years, I’ve been on a quest, seeking that perfect balance of creamy, tangy, and savory that transforms a simple bowl of greens into an irresistible masterpiece. Why do we all fall head over heels for Caesar salad? It’s that delightful interplay of textures and flavors: the crisp romaine, the salty croutons, the sharp Parmesan, and of course, that glorious dressing. But let’s be honest, not all Caesar salad dressings are created equal. Store-bought versions often fall flat, missing the depth and complexity that truly defines a great Caesar. This recipe, however, is the culmination of countless experiments, yielding a dressing so rich and flavorful, it will undoubtedly become your go-to. Get ready to elevate your salad game to an entirely new level!
The Best Caesar Salad Dressing
Forget those bottled imposters. Today, we’re diving deep into the heart of what makes a Caesar salad truly sing: a homemade dressing that’s rich, tangy, creamy, and bursting with umami. This isn’t just a dressing; it’s an experience. I’ve spent years tweaking and perfecting this recipe, and I’m thrilled to share it with you. It’s surprisingly simple to make, and the difference it makes to your salad is nothing short of transformative. The key lies in the quality of the ingredients and a little bit of emulsification magic.
Ingredients:
Instructions:
Phase 1: Building the Flavor Base
The foundation of any great Caesar dressing is a powerful flavor base, and that starts with garlic. For this recipe, we want our garlic to be finely minced. You can use a microplane for the absolute finest texture, or a sharp knife and a little patience. The goal is to break down the garlic as much as possible so it melds seamlessly into the dressing without any harsh, raw bites. Add your minced garlic to a medium-sized bowl. Now, sprinkle in the 1/2 teaspoon of kosher salt. This might seem like a lot of salt for just garlic, but it’s going to work in conjunction with the garlic to create a paste. Use the back of your spoon or a fork to mash the garlic and salt together. Really work it, as if you’re trying to create a garlic paste. This process starts to break down the garlic’s cell walls, releasing its potent flavor and making it more soluble in the oil and egg mixture to come. This step is crucial for a smooth, well-integrated garlic flavor.
Phase 2: Emulsifying the Richness
Next, we’re going to introduce the richness and tang. Add the two large egg yolks to the bowl with the garlic and salt. Make sure your egg yolks are at room temperature; this helps them emulsify more readily with the oil, creating a smoother, more stable dressing. If your eggs are cold, you can warm them gently by placing them in a bowl of warm water for a few minutes. Now, add the Dijon mustard and the tablespoon of fresh lemon juice. The Dijon mustard acts as another emulsifier, helping to bind the fat (oil) with the liquids (egg yolk, lemon juice), and also provides a sharp, piquant flavor that cuts through the richness. The lemon juice brings a bright, acidic counterpoint that is essential for a balanced Caesar. Stir all of these ingredients together thoroughly with a whisk until they are well combined. The mixture will start to look a little lighter and creamier at this stage.
Phase 3: The Slow Drizzle of Olive Oil
This is where the magic of emulsification truly happens, and it requires a bit of patience. We’re going to slowly drizzle in the 1/2 cup of extra virgin extract olive oil. Start by adding just a few drops of olive oil at a time, whisking constantly and vigorously. As you whisk, you’ll notice the mixture begin extractning to thicken and transform into a creamy emulsion. This slow and steady addition of oil is key. If you add the oil too quickly, the emulsion will break, and you’ll end up with a greasy, separated mess. Think of it like making mayonnaise; slow and consistent whisking is your best friend. Continue to drizzle in the olive oil, a tablespoon at a time, whisking continuously until all the oil has been incorporated and the dressing has reached a thick, creamy consistency. It should coat the back of your spoon beautifully. If at any point it seems like it’s getting too thick or the whisking is becoming difficult, you can add a tiny splash of water or a little more lemon juice to loosen it up.
Phase 4: Adding the Umami and Finishing Touches
Now that we have a beautifully emulsified base, it’s time to add the final layers of flavor. Stir in the Worcestershire sauce. This dark, savory liquid is a secret weapon in many dressings, providing a deep umami note that is characteristic of classic Caesar. It adds a subtle complexity that is hard to replicate. Then, gently fold in the 1/4 cup of finely grated Parmesan cheese. Use a spatula or a spoon to incorporate the cheese. You don’t want to overmix at this stage; we want those little flecks of Parmesan to remain distinct. Taste the dressing. This is your opportunity to adjust the seasoning. Does it need more salt? A little more tang from lemon juice? Or perhaps a bit more kick from freshly ground black pepper? Add freshly ground black pepper to your liking – I prefer a good generous grind for that pungent warmth. Continue to taste and adjust until you achieve your perfect balance. The dressing should be rich and creamy, with a bright citrusy tang, a savory depth from the Worcestershire and Parmesan, and a subtle garlicky bite.
Phase 5: Chilling and Serving
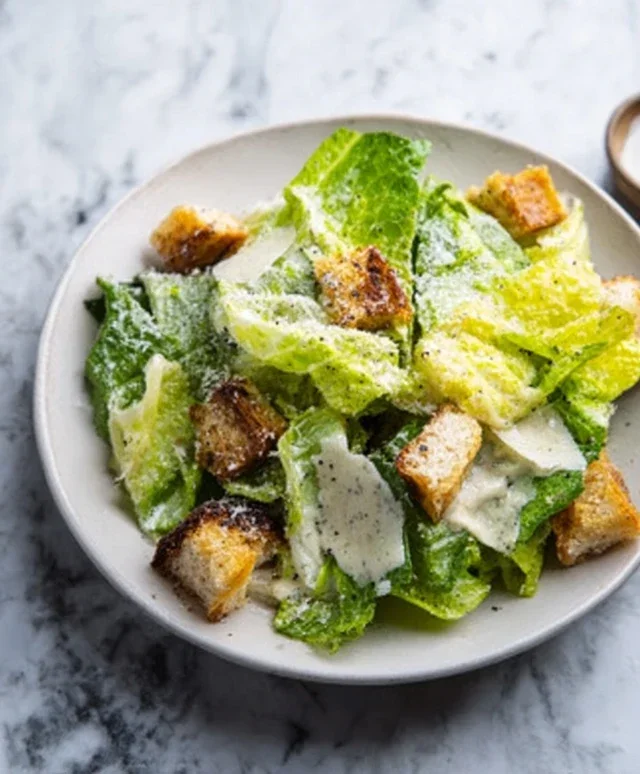
Once you’re happy with the flavor, cover the bowl tightly with plastic wrap or transfer the dressing to an airtight container. Refrigerate the dressing for at least 30 minutes before serving. This chilling period allows the flavors to meld and deepen, and it also helps to thicken the dressing slightly more. This dressing is best served cold. When you’re ready to assemble your Caesar salad, toss your crisp romaine lettuce with a generous amount of this glorious dressing. Top with extra grated Parmesan cheese and some freshly cracked black pepper. You can also add croutons, grilled chicken, or shrimp for a complete meal. This dressing will keep in the refrigerator for about 3-4 days. Enjoy the best Caesar salad you’ve ever had!
Conclusion:
You’ve now unlocked the secret to achieving truly The Best Caesar Salad Dressing! This recipe is a game-changer because it balances the classic creamy, tangy, and savory notes perfectly. Forget those bland store-bought versions; the fresh ingredients and simple technique create a dressing that’s both complex in flavor and incredibly satisfying. Its versatility makes it a star not just for salads, but as a dip or marinade too. Don’t hesitate to whip up a batch – I guarantee you’ll be hooked!
Feel free to get creative with your salads. This dressing is divine tossed with crisp romaine lettuce, crunchy croutons, and shavings of Parmesan cheese, of course. But don’t stop there! Try it with grilled chicken or shrimp, roasted vegetables, or even as a flavorful binder for potato salad. For a delightful twist, consider adding a pinch of smoked paprika for a subtle smokiness or a touch of Dijon mustard for an extra layer of sharpness.
I encourage you to try this recipe for yourself. The effort is minimal, but the reward is a dressing that elevates any dish. Enjoy the journey of making your own delicious, homemade Caesar dressing!
Frequently Asked Questions:
Why is this The Best Caesar Salad Dressing recipe so special?
This recipe stands out due to its emphasis on fresh, high-quality ingredients. The combination of emulsified egg yolk, good olive oil, fresh garlic, zesty lemon juice, savory Worcestershire sauce, and pungent Parmesan cheese creates a depth of flavor that bottled dressings simply cannot replicate. It’s a harmonious blend of creamy, tangy, and umami notes that is truly irresistible.
Can I make this dressing ahead of time?
Absolutely! This The Best Caesar Salad Dressing can be made up to 3 days in advance and stored in an airtight container in the refrigerator. The flavors will actually meld and intensify over time, making it even more delicious. Just give it a good whisk or shake before serving.
I don’t have anchovy paste. What can I use instead?
While anchovy paste provides a crucial umami depth, you can substitute it with 1-2 finely minced anchovy fillets. If you prefer to omit anchovies altogether, you can increase the Worcestershire sauce slightly or add a pinch of miso paste for a similar savory boost, though the authentic Caesar flavor will be slightly altered.
The Best Caesar Salad Dressing
A classic, creamy, and tangy Caesar salad dressing made from scratch.
Ingredients
-
1/2 cup mayonnaise
-
2 tablespoons olive oil
-
2 cloves garlic, minced
-
1 tablespoon lemon juice
-
1 teaspoon Dijon mustard
-
1/2 teaspoon Worcestershire sauce
-
1/4 cup grated Parmesan cheese
-
Salt and black pepper to taste
Instructions
-
Step 1
In a medium bowl, whisk together the mayonnaise, olive oil, minced garlic, lemon juice, Dijon mustard, and Worcestershire sauce until well combined. -
Step 2
Stir in the grated Parmesan cheese. -
Step 3
Season with salt and freshly ground black pepper to taste. -
Step 4
Whisk until the dressing is smooth and creamy. -
Step 5
Taste and adjust seasonings as needed. -
Step 6
For best results, let the dressing sit for at least 15 minutes before serving to allow the flavors to meld.
Important Information
Nutrition Facts (Per Serving)
It is important to consider this information as approximate and not to use it as definitive health advice.
Allergy Information
Please check ingredients for potential allergens and consult a health professional if in doubt.